-40%
10 Dell Alienware m18x 18 R2 SATA 2.5 Hard Drive HDD SSD Plastic Latch Clip Hook
$ 8.17
- Description
- Size Guide
Description
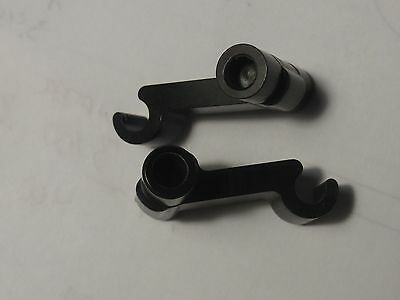
Pictures show the actual FPC socket assembly, and illustrate how to take the clip out without breaking the fragile hooks.If the plastic clip of the HDD connector in your Alienware m18x R2 is unfortunately broken,
this replacement should do the fix.
This replacement is compatible with m18x
R2 ONLY
(the 2012 model with 3rd gen CPU such as 3940XM)
,
It is
NOT compatible with the R1
(the 2011 model) nor the "R3/R4/R5" (AW 18 in 2013, 2014 and 2015).
Please check my other listing if you need the replacement for the R1.
Package includes:
10
whole assemblies in a sequential pack (one cut from a reel)
(Total 10 clips included per order quantity)
Tips:
The socket assembly is a direct match/replacement for the HDD connector socket used in Alienware m18x R2.
However, replacing the whole assembly involves reworking the soldering, which requires more effort than replacing just the clip; so the easiest way is to take the clip out, and put the clip to the original socket.
Taking the Clip out from the replacement socket:
the plastic hooks at the plastic clip are very very fragile,
I already had a few tries by just pulling the clip out without first removing the socket's edges, only one clip survived :(
To ensure a successful disassemble, I highly recommend sacrificing the (replacement) socket as illustrated in the pictures since only the clip is needed.
(using a cutter/pliers to cut the socket at the middle also works, but the pins might shoot out everywhere)
*Just to clarify, I mean to break the taps on the replacement socket, then put the replacement clip to the original socket on the motherboard.
Please don't damage the original socket on the motherboard 0_0
Installing the replacement clip to the original socket:
When installing the clip onto the original socket,
I tried pushing it evenly down, and one side down then the other side,
both had a high failure rate.
The only method I had luck with was to put one side down first, (doesn't need to really push since the other side is free, so there is still a lot of space to move the clip to one side)
now it's one side down (locked) in the close position, while the other side is out on top of the socket.
Then pull the clip up to the open position (now one side at open position while the other side isn't installed yet), use one finger to support the locked side (which is at the open position), so it stays at the open position, (while the other side of the clip is still hanging over the socket)
now use another finger to push the other side down gently,
try to stop when the clip just goes beyond the locking bump.
Now the clip should be in,
and hopefully the hook isn't broken :)
*****
The idea is to minimize the distance between the two hooks while the hook passes through the locking bump. Pushing the clip evenly down would require two hooks to go over the two bumps at the same time. One side complete down while the the other side is trying to go over the bump would kind of create a bad angle, the other side wouldn't even line up with the outer lane (it would point to the inner layer of the socket rather than going to the outside layer)...
Phew~ Good Luck!
Side Note:
The clip has one hallow side, and the other side is convex compared to the 2 ends (where the hooks extends underneath).
The socket's top is not flush. One side is higher than the other.
When installing the replacement clip to the original socket on the motherboard,
the hallow side of the clip should be facing the higher side of the socket;
So the clip will "sit" on the lower side of the socket, and the high side of the socket with the top of the clip will be flush.
If not clear, feel free to just take a look at the replacement socket assembly, and compare it to the original one.
Thanks for looking; please feel free to email should you have any question regarding the item :)


